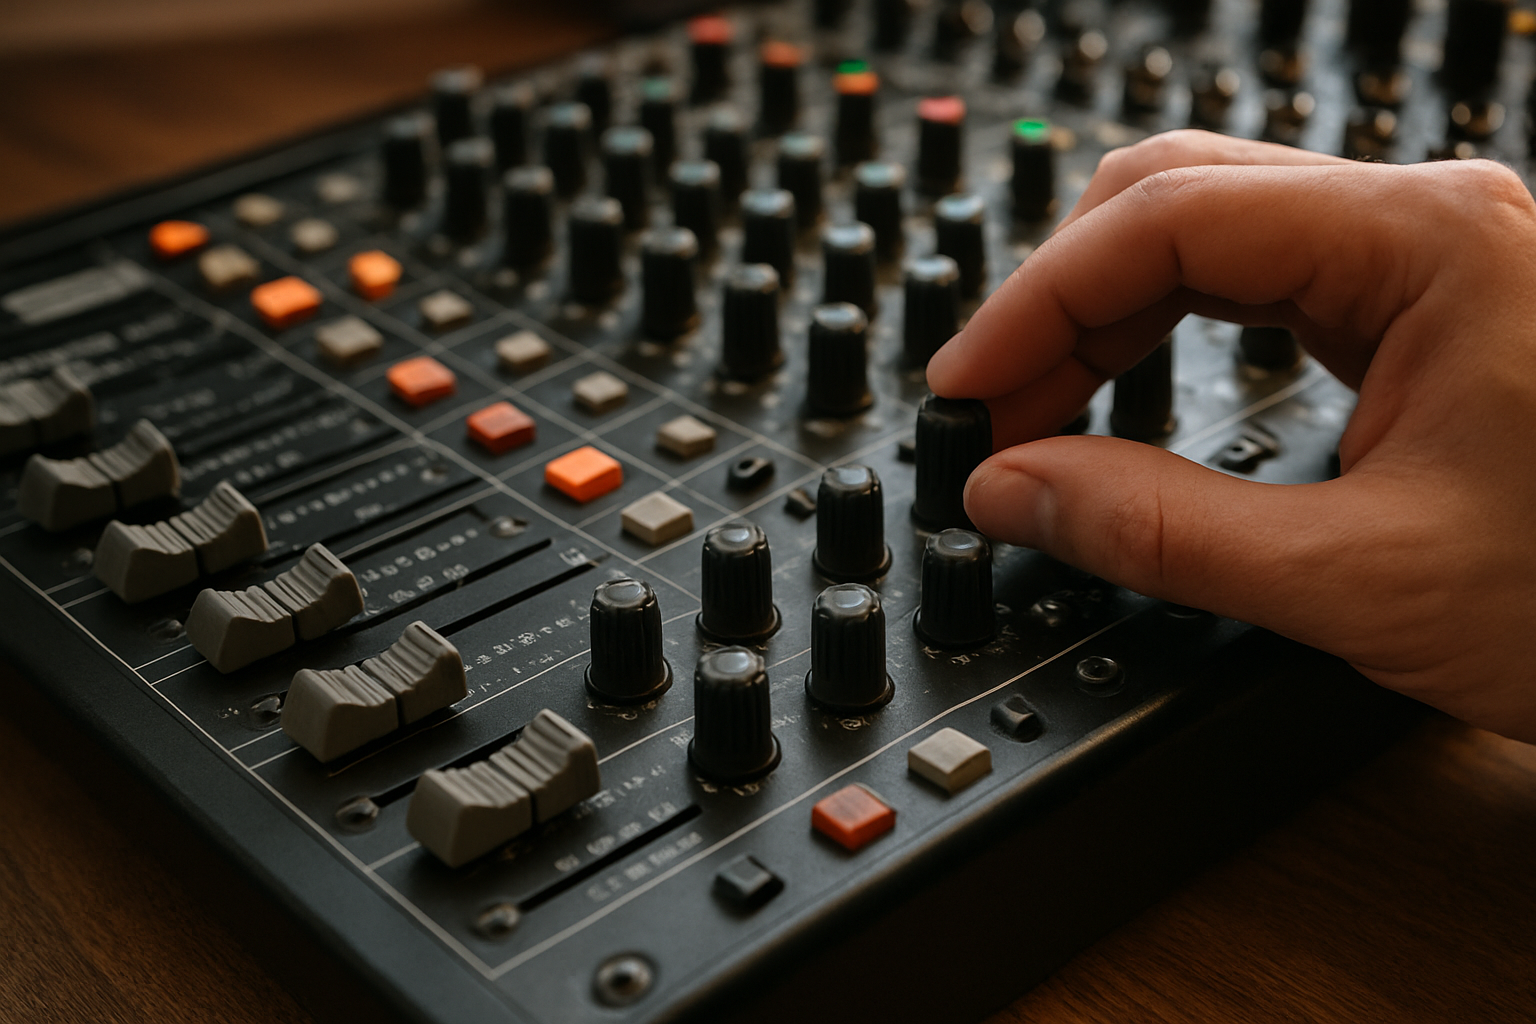
- Understanding Your Audio Mixer's Core Architecture
- Mastering Gain Staging for Pristine Audio Quality
- Setting Optimal Input Levels
- Channel Fader Positioning Strategy
- Strategic EQ Implementation Techniques
- Advanced Monitoring and Feedback Prevention
- Implementing Effective Feedback Suppression
- Professional Effects Processing Applications
- Troubleshooting Common Audio Issues
- What causes sudden volume drops during performance?
Understanding Your Audio Mixer's Core Architecture
Professional audio mixers represent sophisticated signal processing ecosystems that demand comprehensive understanding for optimal performance. These complex devices serve as the nexus where multiple audio sources converge, undergo dynamic manipulation, and emerge as cohesive sonic experiences.
The fundamental signal flow pathway begins with input channels, each equipped with preamp circuitry designed to boost microphone-level signals to line-level operations. Understanding impedance matching becomes crucial here. High-impedance inputs accommodate instruments like electric guitars, while low-impedance XLR connections handle professional microphones with superior noise rejection characteristics.
Channel strips contain essential processing modules including equalization, auxiliary sends, and gain structure controls. Each element contributes to the overall tonal architecture and spatial positioning within your mix. The auxiliary send functionality enables parallel processing through external effects units or creates independent monitor feeds for performers.
Professional audio engineers consistently emphasize that understanding signal flow before touching any fader or knob dramatically improves mixing outcomes and prevents costly mistakes during live performances.
Mastering Gain Staging for Pristine Audio Quality
Proper gain staging forms the bedrock of professional audio production. This critical process involves optimizing signal levels throughout the entire audio chain to maximize dynamic range while minimizing unwanted noise and distortion artifacts.
Setting Optimal Input Levels
Begin by adjusting preamp gain controls to achieve healthy signal levels without clipping. Target peak levels should hover around -12dB to -6dB on digital mixers, providing adequate headroom for dynamic material. Analog consoles typically operate with higher nominal levels, requiring different calibration approaches.
Monitor your input meters constantly during soundcheck procedures. Inconsistent performers may require gain adjustments between songs or speaking segments. Establish conservative settings that accommodate the loudest expected passages without overloading the input stage.
Channel Fader Positioning Strategy
Position channel faders around the unity gain mark (0dB) as your starting reference point. This positioning provides maximum control range for both attenuation and boosting during performance. Faders pushed to maximum positions indicate insufficient input gain, while faders near the bottom suggest excessive preamp levels.
The master output section requires similar attention. Your main mix bus should peak between -3dB and 0dB for optimal loudness without digital clipping. Subgroup assignments can help manage complex mixes with multiple instrument families or vocal sections.
Strategic EQ Implementation Techniques
Equalization serves as your primary tonal sculpting tool, enabling precise frequency domain adjustments that enhance clarity and musical balance. Professional EQ application follows subtractive principles before additive processing.
High-pass filtering eliminates unnecessary low-frequency content that muddies your mix. Most vocal microphones benefit from 80Hz to 100Hz high-pass settings, removing rumble and handling noise. Instrument-specific filtering prevents frequency masking between bass guitars, kick drums, and other low-frequency sources.
Parametric EQ bands offer surgical precision for problem frequency identification and correction. Narrow Q settings target specific resonant frequencies, while broader curves provide musical enhancement. The midrange frequencies between 200Hz and 2kHz contain most instruments' fundamental character and require careful attention.
| Frequency Range | Typical Applications | Common Adjustments |
|---|---|---|
| 80-250 Hz | Low-end warmth, fundamental tones | High-pass filtering, muddiness reduction |
| 250-1kHz | Body, presence, clarity | Notch problematic resonances |
| 1-8kHz | Definition, intelligibility | Presence boost, sibilance control |
| 8-20kHz | Air, brightness, sparkle | Gentle high-frequency enhancement |
Advanced Monitoring and Feedback Prevention
Professional audio environments demand sophisticated monitoring strategies that ensure optimal performer communication while maintaining audience audio quality. Understanding acoustic feedback mechanisms enables proactive prevention rather than reactive solutions.
Auxiliary send configurations create independent monitor mixes tailored to individual performer requirements. Vocalists typically need prominent vocal levels with minimal instrumental bleed, while instrumentalists require rhythm section emphasis for tight ensemble performance.
Strategic microphone positioning and polar pattern selection significantly impact feedback susceptibility. Cardioid patterns reject off-axis sound sources, while hypercardioid microphones offer superior rear rejection at the expense of increased side sensitivity. Dynamic microphones generally provide better feedback resistance compared to sensitive condenser alternatives.
Implementing Effective Feedback Suppression
Graphic equalizers serve as powerful feedback suppression tools when properly configured. Identify problematic frequencies through careful listening and systematic frequency sweeps. Ring-out procedures during soundcheck reveal potential feedback frequencies before audience arrival.
Automatic feedback suppressors offer real-time protection but should complement rather than replace proper acoustic design and microphone technique. These devices detect feedback onset and apply narrow notch filters to problematic frequencies.
Professional Effects Processing Applications
Effects processing enhances natural acoustic characteristics while creating immersive spatial environments that engage audiences and support musical expression. Understanding when and how to apply various effects distinguishes amateur from professional productions.
Reverberation adds natural ambience and spatial depth to dry vocal and instrumental sources. Digital reverb algorithms simulate various acoustic environments from intimate chambers to expansive concert halls. Adjust pre-delay parameters to maintain clarity while establishing spatial positioning.
- Vocal reverb settings should complement the musical style and venue acoustics
- Instrumental reverb requires careful frequency shaping to prevent muddiness
- Different reverb types suit various applications: plate, hall, room, chamber
- Send levels control the wet/dry balance for natural integration
Compression dynamics processing controls signal amplitude variations, ensuring consistent levels while preserving musical expression. Vocal compression typically employs moderate ratios between 3:1 and 6:1 with attack times that preserve consonant clarity.
Troubleshooting Common Audio Issues
Professional audio environments present numerous challenges requiring systematic diagnostic approaches and rapid problem resolution skills. Understanding common failure modes enables efficient troubleshooting procedures.
Ground loop hum indicates electrical interference between connected equipment with different ground potentials. Balanced connections using XLR or TRS connectors provide superior noise rejection compared to unbalanced alternatives. Direct injection boxes isolate instrument signals while providing proper impedance conversion.
Intermittent crackling sounds often originate from oxidized connector contacts or failing cable assemblies. Regular maintenance includes contact cleaner application and cable continuity testing using multimeter devices.
What causes sudden volume drops during performance?
Thermal protection circuits in power amplifiers activate when operating temperatures exceed safe thresholds. Inadequate ventilation or excessive load impedances trigger these protective mechanisms. Monitor amplifier indicator lights for overload warnings.
Wireless microphone systems experience dropouts due to RF interference or battery depletion. Frequency coordination becomes critical in dense RF environments with multiple wireless devices operating simultaneously.


Share:
Best Type-C Wireless Microphones for Content Creation 2026
Globe Lantern Softboxes vs Traditional: Which Creates Better Light