

- Understanding the Signal Flow Journey
- Input Section: Where Audio Begins Its Transformation
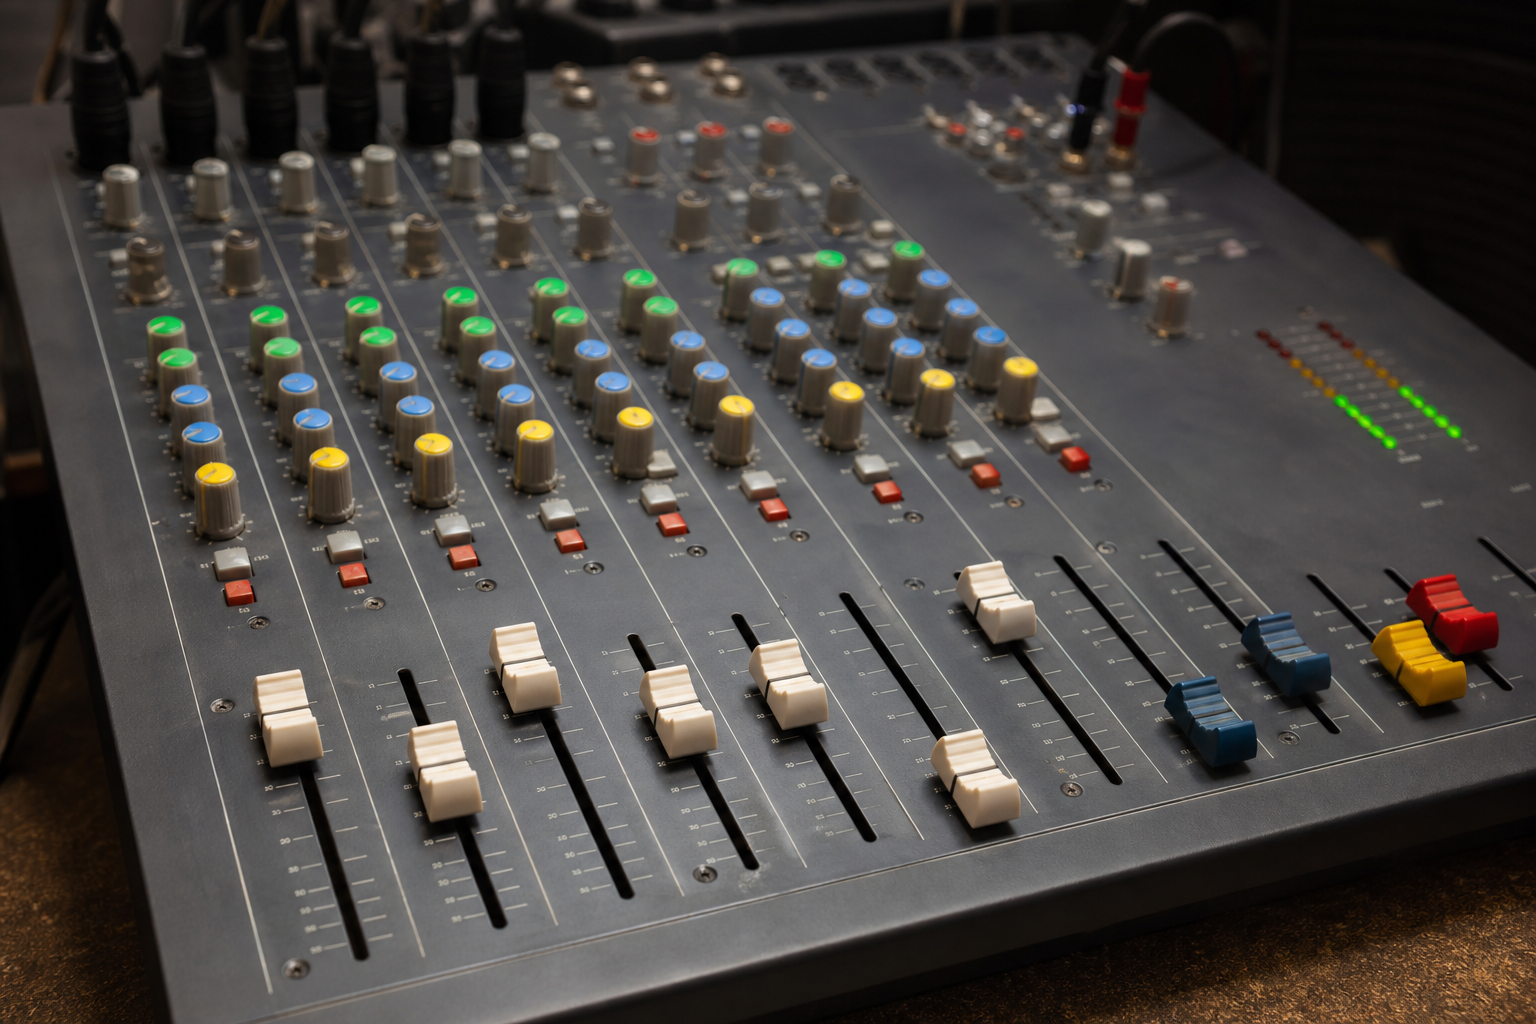
- Gain and Trim Controls
- Phantom Power Switches
- Channel Strip Fundamentals
- Equalization Controls
- Auxiliary Sends
- Pan and Balance Positioning
- Fader Operation and Level Management
- Master Section Controls
- Master Fader
- Main Output Meters
- Monitoring and Headphone Sections
- Effects and Processing Integration
- Common Mixer Types and Their Applications
- Practical Setup Procedures
- Troubleshooting Common Audio Issues
- Why Is There No Sound Coming Through?
- What Causes Feedback and How Can I Eliminate It?
- Maintenance and Care Considerations
Navigating the labyrinthine world of audio mixing can feel overwhelming, especially when confronted with an intimidating panel festooned with knobs, faders, and mysterious buttons. Whether you're a videographer capturing pristine dialogue, a musician crafting sonic landscapes, a DJ orchestrating euphoric dance floors, or a karaoke enthusiast seeking crystal-clear vocals, understanding your audio mixer's fundamental controls is paramount to achieving professional-grade sound. This comprehensive guide demystifies the essential elements of audio mixers, transforming complexity into clarity.
Understanding the Signal Flow Journey
Before manipulating any control, grasping how audio signals traverse through your mixer establishes a foundational knowledge base. Audio enters through input channels, undergoes various processing stages, and exits through output connections. This sequential pathway—often termed the signal chain—determines the sonic characteristics of your final output.
Each input channel functions as an independent pathway for a single audio source, whether that's a wireless UHF microphone, desktop microphone, or instrument. The signal progresses through gain staging, equalization, auxiliary sends, and ultimately reaches the master fader where all channels converge. Visualizing this flow prevents confusion when troubleshooting audio issues and enables systematic adjustments that yield predictable results.
Input Section: Where Audio Begins Its Transformation
Gain and Trim Controls
The gain knob—sometimes labeled as trim or preamp—serves as the gatekeeper for incoming audio signals. This crucial control determines how much amplification applies to the source before any other processing occurs. Setting appropriate gain levels prevents distortion from overly hot signals while maintaining sufficient volume to avoid noise contamination.
Rotate the gain control clockwise gradually while monitoring the channel's level indicator. Aim for signal peaks that illuminate the yellow zone on most meters, avoiding the red clipping indicators. Insufficient gain produces weak, noisy audio, whereas excessive gain creates harsh distortion that no subsequent processing can rectify. This foundational adjustment underpins all downstream audio quality.
Phantom Power Switches
Many condenser microphones—commonly used in videography and studio recording—require phantom power, typically 48 volts delivered through XLR cables. The phantom power button, often marked as +48V, activates this electrical supply. Engage this switch only when using condenser microphones; dynamic microphones function without it.
Activating phantom power while microphones are connected can produce audible pops through speakers. Reduce volume levels before toggling this switch, protecting both your audio equipment and listeners' ears from potentially damaging transients.
Channel Strip Fundamentals
Equalization Controls
Equalization—colloquially known as EQ—sculpts the tonal character of audio by boosting or attenuating specific frequency ranges. Most mixers feature at least three-band EQ sections controlling high, mid, and low frequencies. Advanced models offer parametric EQ with sweepable frequency selection and bandwidth control.
The low-frequency knob affects bass content, typically centered around 80-100 Hz. Mid-range controls influence vocal presence and instrument body, usually spanning 1-4 kHz. High-frequency adjustments add brilliance or reduce harshness in the 8-12 kHz spectrum. Subtle movements yield significant sonic changes; begin with minimal adjustments of 2-3 dB increments.
Auxiliary Sends
Auxiliary sends—abbreviated as AUX—route portions of channel signals to external destinations such as effect processors, monitor speakers, or recording devices. These parallel pathways preserve the original signal while creating additional outputs for specific purposes.
Pre-fader auxiliary sends remain unaffected by the channel fader position, making them ideal for stage monitors where performers require consistent levels regardless of front-of-house mixing adjustments. Post-fader sends change proportionally with channel fader movements, suitable for effects processing where the effect level should mirror the main signal intensity.
Pan and Balance Positioning
The pan control determines a channel's position within the stereo field, distributing sound between left and right outputs. Center positioning delivers equal signal to both speakers, while rotating the knob leftward or rightward emphasizes one side.
Strategic panning creates spatial separation in dense mixes. Consider positioning vocals centrally, panning guitars opposite each other, and placing keyboards slightly off-center. This deliberate placement prevents frequency masking where competing elements occupy identical sonic territory, resulting in muddy, indistinct audio.
Fader Operation and Level Management
Channel faders control the final volume contribution each input makes to the master mix. These linear or rotary controls offer precise, tactile adjustment compared to rotary knobs. The nominal operating position—typically marked as unity gain or 0 dB—represents optimal signal strength without additional amplification or attenuation.
Professional mixing technique involves setting individual channel gains correctly, then using faders for blending rather than compensating for improper gain staging. This methodology preserves headroom and maintains optimal signal-to-noise ratios throughout the audio chain.
Avoid pushing all faders to maximum positions, which eliminates mixing flexibility and increases noise floors. Instead, aim for balanced levels where faders rest near unity gain, allowing upward and downward adjustments as the performance unfolds.
Master Section Controls
Master Fader
The master fader controls the overall output level sent to speakers, recording devices, or broadcast systems. This final volume control affects all channels simultaneously, serving as the ultimate output regulator. During performances, the master fader typically remains at unity gain, with individual channel faders handling mix balancing.
Main Output Meters
Output level meters provide visual feedback about the mixed signal strength. LED meters display a color-coded scale: green indicates healthy levels, yellow suggests approaching maximum capacity, and red signals clipping distortion. Consistent operation in the yellow-green transition zone maximizes dynamic range while preventing distortion.
Monitoring and Headphone Sections
Dedicated headphone outputs with independent volume controls allow private monitoring without affecting main outputs. This feature proves invaluable when DJs prepare upcoming tracks or musicians require click tracks inaudible to audiences.
Monitor selection buttons route different signals to headphones or control room speakers. Options typically include the main mix, specific auxiliary sends, or isolated channels for detailed listening. Utilizing these monitoring capabilities facilitates precise adjustments that would be impossible relying solely on main outputs.
Effects and Processing Integration
Many contemporary mixers incorporate built-in effects processors providing reverb, delay, chorus, and compression. Effects send knobs on individual channels determine how much signal routes to these processors, while effects return controls adjust the processed signal's contribution to the final mix.
| Effect Type | Primary Application | Typical Setting |
|---|---|---|
| Reverb | Spatial ambience for vocals | Light to moderate depth |
| Delay | Rhythmic enhancement | Tempo-synchronized timing |
| Compression | Dynamic range control | 3:1 to 4:1 ratio for vocals |
Exercise restraint when applying effects. Excessive reverb creates muddy, distant-sounding mixes, while over-compression yields lifeless, dynamically flat audio. Subtle application that enhances rather than dominates characterizes professional mixing.
Common Mixer Types and Their Applications
Analog mixers offer tactile, hands-on control with minimal latency, preferred by DJs and live performers requiring instantaneous response. Digital mixers provide extensive routing flexibility, scene memory, and integrated processing, favored by videographers and musicians working in complex production environments.
Compact mixers with four to eight channels suit solo performers, podcasters, and small karaoke setups. Medium-format consoles with 12-24 channels accommodate bands, wedding receptions, and corporate events. Large-format mixers exceeding 32 channels serve concert productions, broadcast facilities, and recording studios.
Practical Setup Procedures
Establishing proper mixer configuration before events prevents technical difficulties during critical moments. Follow this systematic approach:
- Connect all audio sources using appropriate cables—XLR cables for microphones, quarter-inch cables for instruments
- Verify phantom power requirements for condenser microphones
- Set all channel gains to minimum positions initially
- Adjust individual gains while monitoring level indicators
- Configure auxiliary sends for monitors or effects as needed
- Test each channel independently before creating the full mix
- Conduct soundcheck with actual performers when possible
Troubleshooting Common Audio Issues
Why Is There No Sound Coming Through?
Silence typically stems from several predictable causes. Verify that phantom power activates for condenser microphones. Confirm channel faders and master fader occupy raised positions rather than minimum settings. Check input selection switches match your cable connections—ensure line inputs activate for line-level sources and microphone inputs for mic-level signals.
What Causes Feedback and How Can I Eliminate It?
Feedback occurs when microphones capture sound from speakers, creating self-reinforcing loops that manifest as high-pitched squealing or low rumbling. Reduce monitor volume, reposition microphones away from speaker cabinets, and apply notch filtering to problematic frequencies. Proper microphone technique—maintaining consistent proximity and angle—also mitigates feedback susceptibility.
Maintenance and Care Considerations
Regular maintenance preserves mixer longevity and performance reliability. Clean control surfaces with compressed air to remove dust accumulation that causes crackling during adjustments. Store mixers in protective cases when transporting to events, safeguarding delicate components from impact damage.
Exercise faders and rotary controls periodically, even during storage periods, preventing oxidation buildup on internal contacts. This simple practice maintains smooth operation and prevents scratchy, intermittent behavior that degrades mixing precision.
Quality audio equipment from reliable suppliers like Hridz.com.au ensures you begin with dependable tools that respond predictably to your adjustments. Combining superior hardware with comprehensive operational knowledge creates the foundation for exceptional audio production across photography, videography, musical performance, and entertainment applications.
Mastering audio mixer controls transforms technical obstacles into creative opportunities. These essential skills empower you to capture pristine dialogue for video projects, deliver balanced mixes for musical performances, and orchestrate immersive audio experiences that captivate audiences. Begin with these fundamental controls, practice deliberately, and watch your audio proficiency flourish.







Share:
Setup Portable Lighting: Quick Guide for On-Location Shoots
Audio Cables Guide: Choosing the Right Cables for Your Setup